How to create new or additional Users
To create a new/additional User, log in to the Administrator console as described in the Administration console section.
Click on ‘Users’:
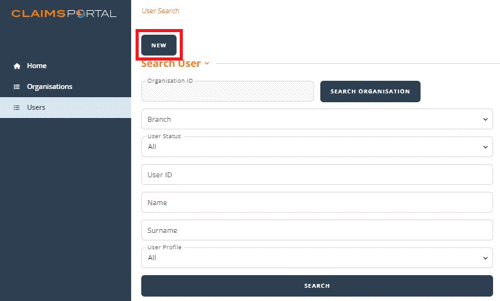
Click on ‘New’, which displays the following form:
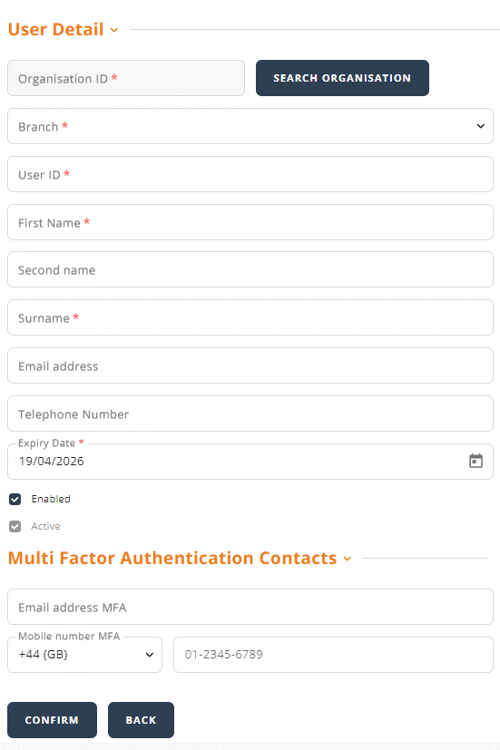
Mandatory information is marked with an asterisk.
- Branch:
- The default is the main branch, but you can organise your users within branches. This functionality is particularly important for Compensators, as you can restrict the users’ worklist to claims allocated to a specific branch.
- Profiles:
- Select the type of profile you would like to assign to the User. See the section regarding User profiles to identify the correct profile.
- User ID:
- The User ID must be unique within the whole of the Portal and not just within your organisation. If the User ID is already in use, an error message will be displayed. The User ID cannot be an email address. Note that the User ID is personal to the User. User IDs and passwords must not be shared, as that is in breach of the User Agreement.
- Expiry date:
- This is the date when the User ID will expire, and access to the Portal is denied. The default is set to 2 years from the creation date. As an Administrator, you need to manage the Expiry dates – see the section on Expiry dates.
- Enabled:
- This must be ticked for the User to have access to the Portal.
- Active:
- This is a secondary flag, which is maintained automatically.
- Email Address MFA
- This must be populated with the users own personal business email address that the MFA one-time passcode will be sent to.
- Mobile Number MFA
- This is optional and Administrators should only add and verify the MFA mobile number once the MFA email address has been set-up and verified.
You will need to create each User ID for each User. Next click ‘Confirm’.
Top Tip: Administrators are fully responsible for managing and maintaining all User accounts. This includes expiry dates and User details.